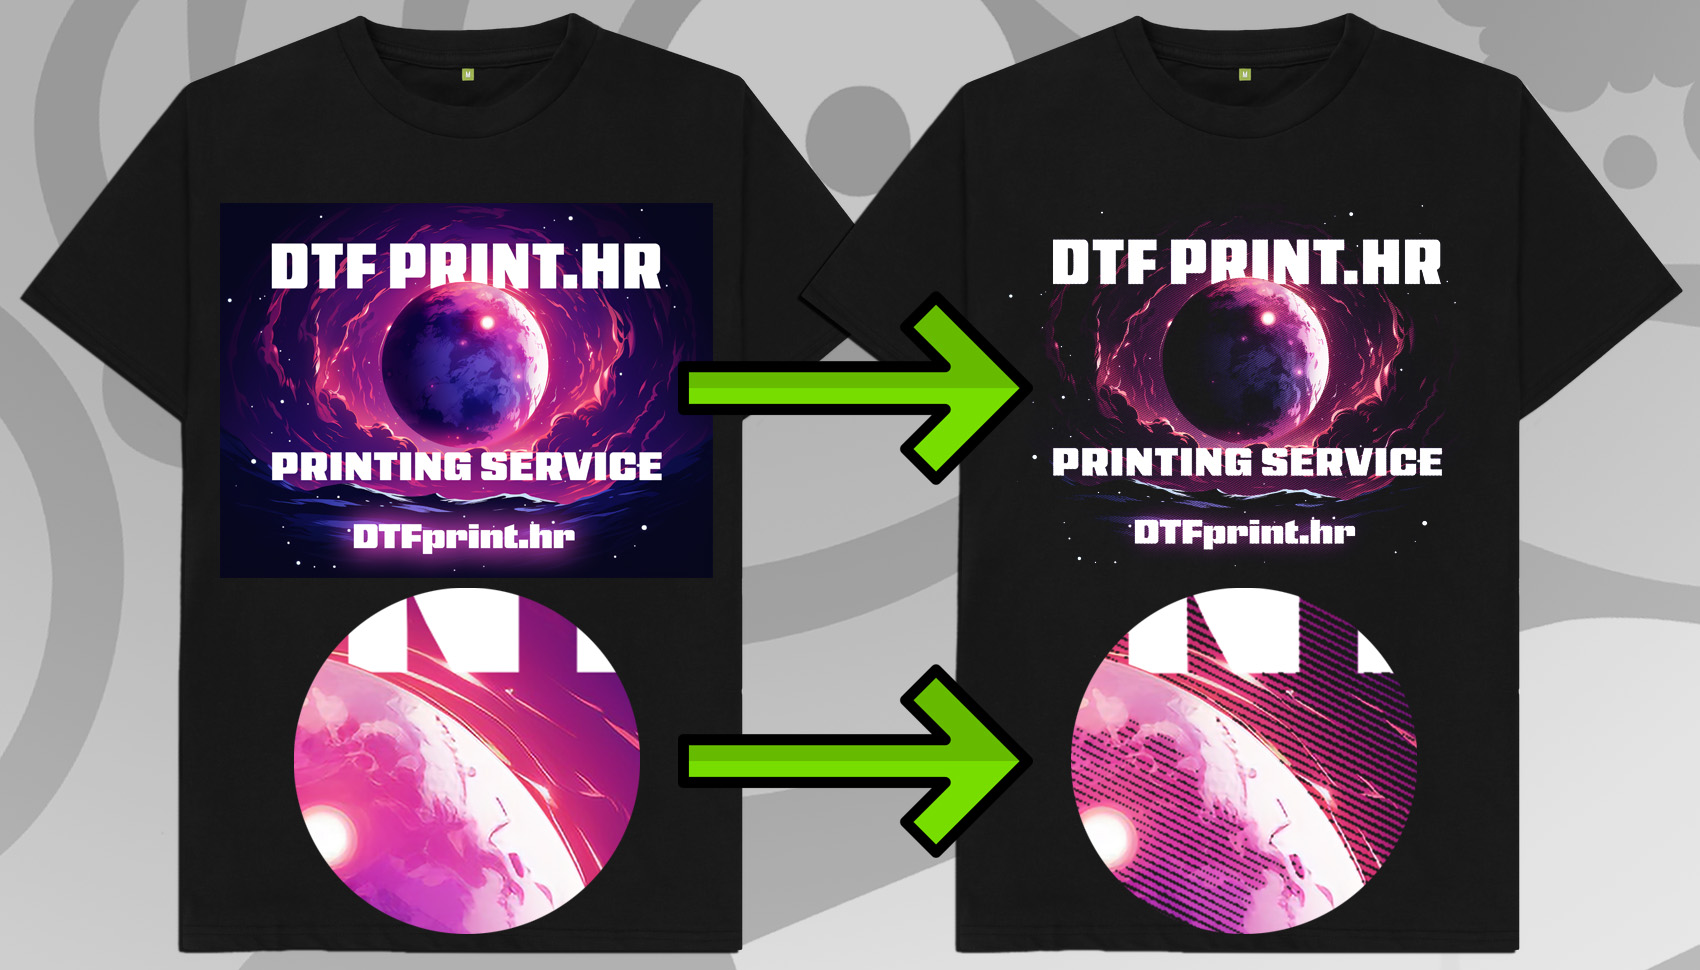
Compared to DTG (Direct to Garment) printers, DTF has a shortcoming when printing semi-transparent graphics. It is not possible to use a PNG graphic with semi-transparency (opacity), because an underbase color is printed beneath every pixel. In addition, pressing huge, fully filled square-shaped designs onto a t-shirt creates a plasticky feel, regardless of whether it is screen printing with plastisol inks, flex films, or DTF. DTG achieves good results in the softness and breathability of the print, but DTF is superior in durability and more vivid colors because it uses an extremely strong adhesive that bonds the transfer to the t-shirt. To get around this problem, creating DTF prints using the halftone technique is becoming increasingly popular. Read the instructions below to learn how to turn your graphic into a halftone version that will be much softer to wear and blend better with the color of the t-shirt. Keep in mind that every graphic is unique - also depending on the color of the t-shirt the graphic is being prepared for - so we advise experimenting while following our instructions.
Some detail is lost during the halftone process, and the level of detail depends on the settings used. To better illustrate the halftone effect, we used very aggressive settings to make the effect more visible. To follow this tutorial, you will need Adobe Photoshop and the graphic you want to apply the halftone process to.
Video instructions:
Written instructions:
Open Photoshop and load your graphic. Below the graphic, create a layer in the color of your t-shirt - in our case, a black t-shirt - a black layer. Duplicate the layer with your graphic. In the end, you should have 2 layers, one above the other.
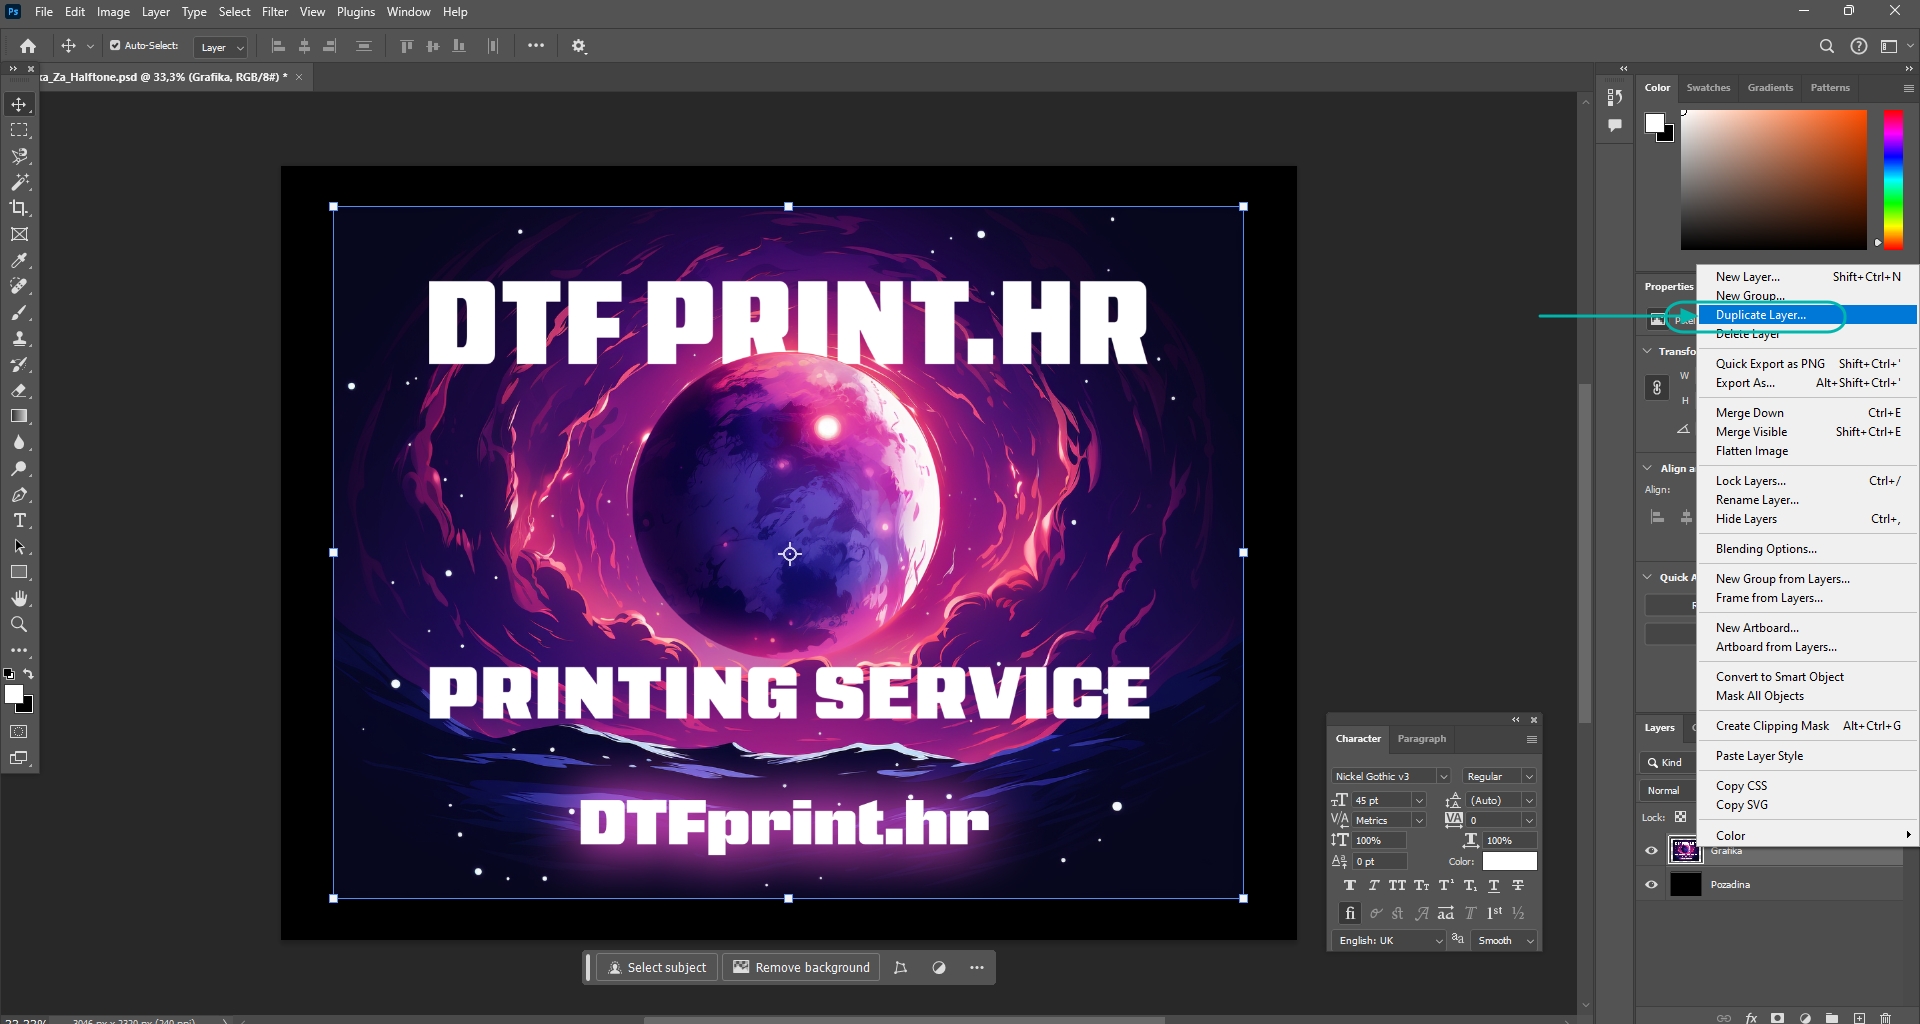
Convert the upper duplicate of your graphic into a "Smart Object". Then double-click the upper layer to open it for editing in a new tab.
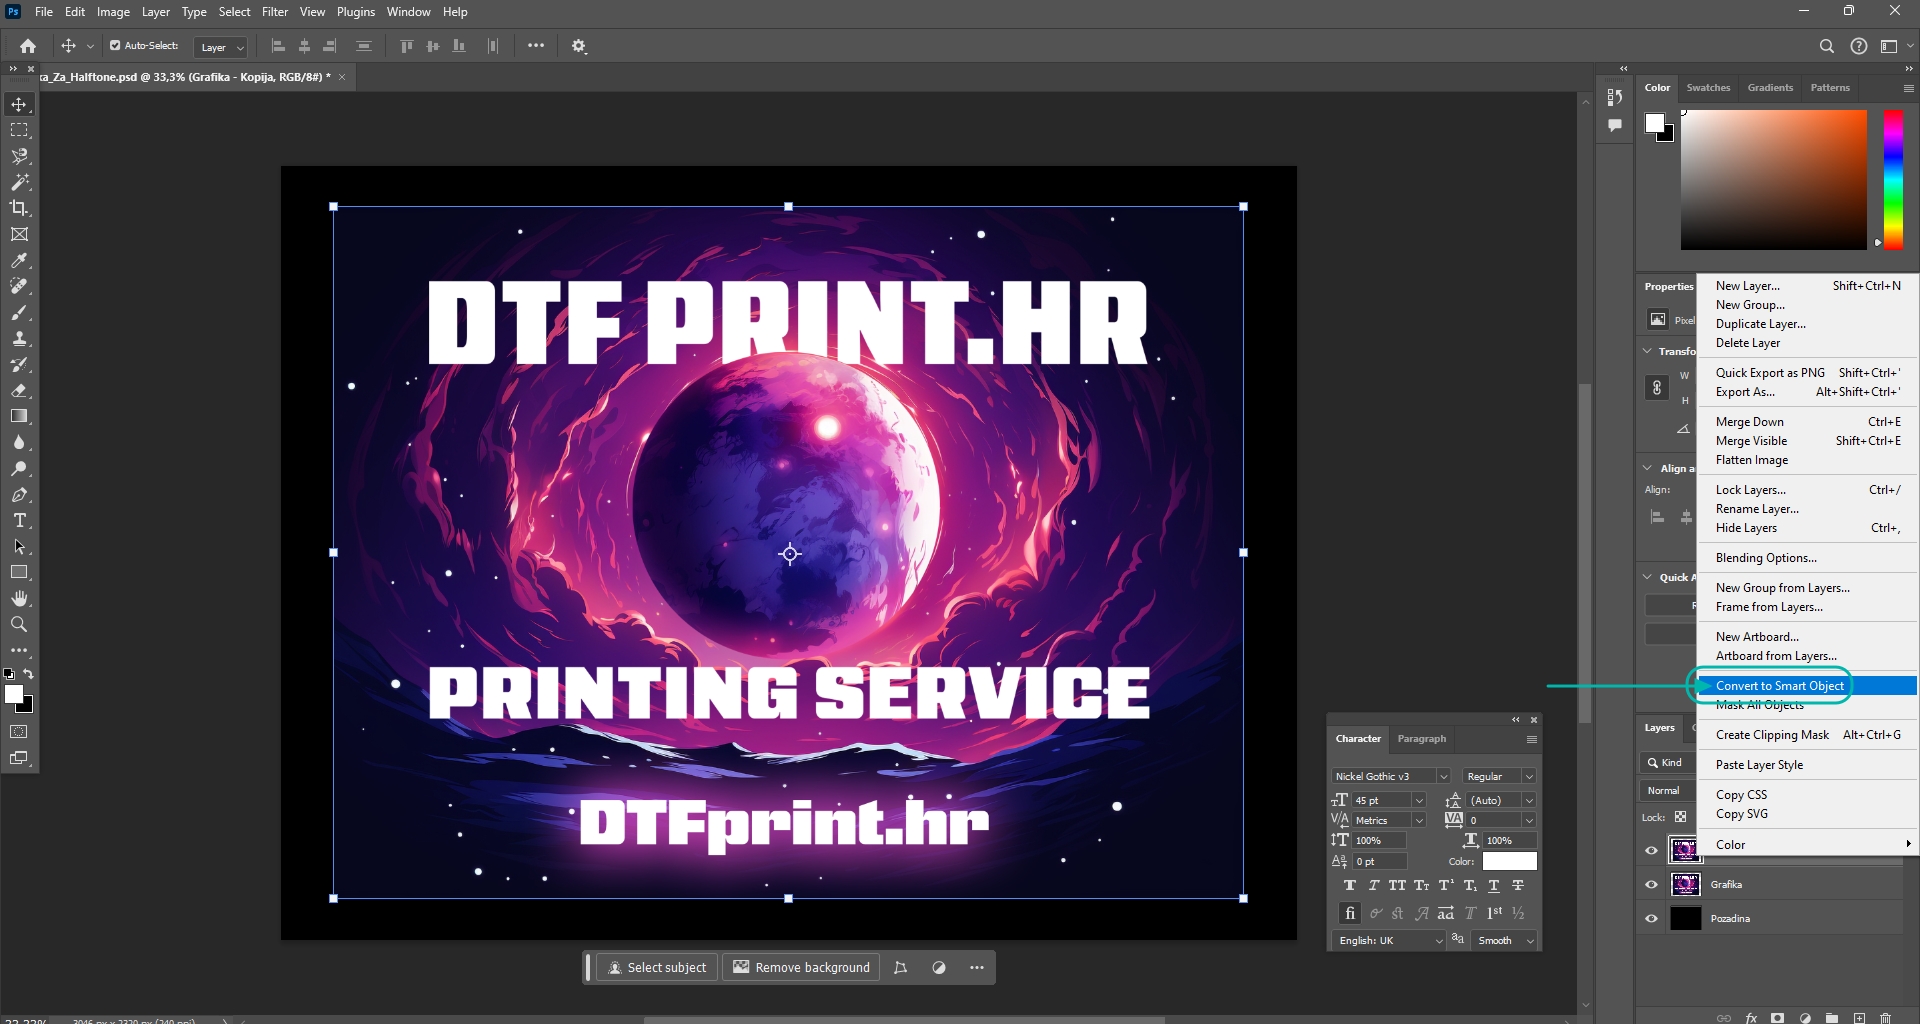
Editing in a new tab:
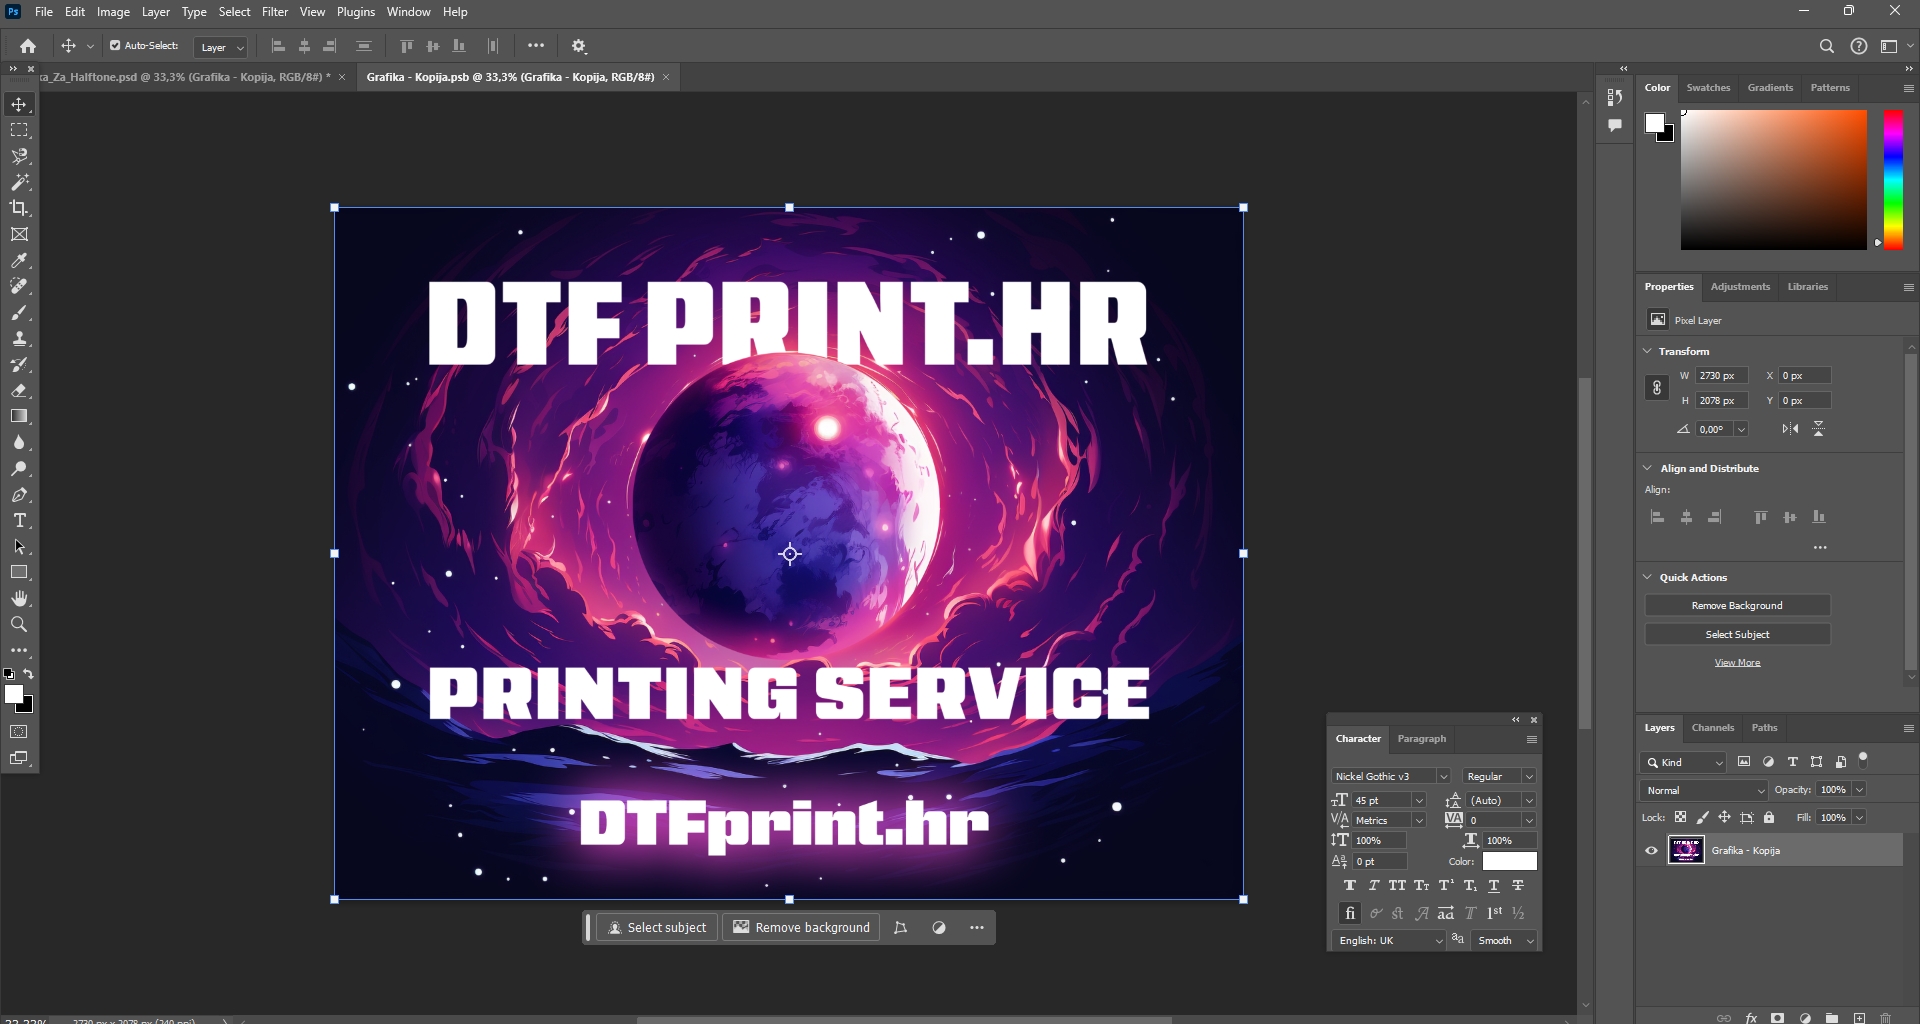
Everything needs to be converted to gray - grayscale. Do this by clicking Image -> Mode -> Grayscale
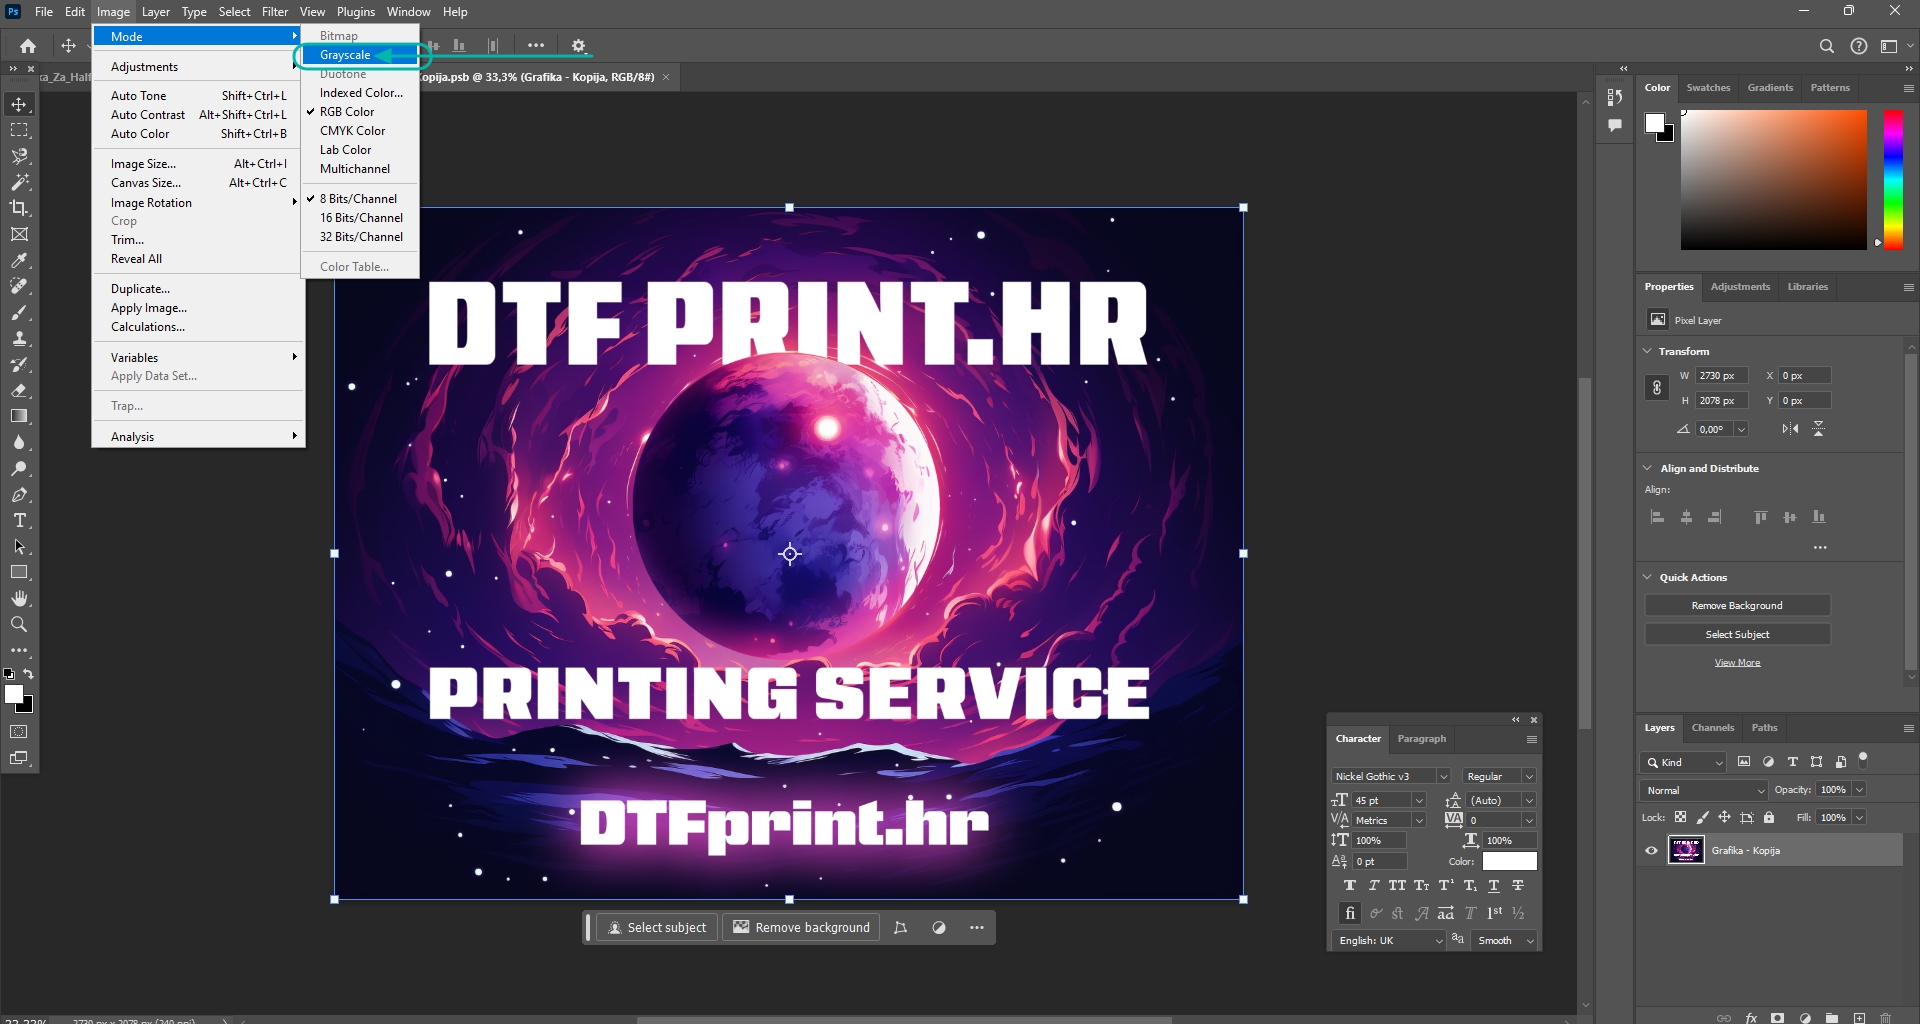
If Photoshop asks whether you want to discard all color information - click -> Discard
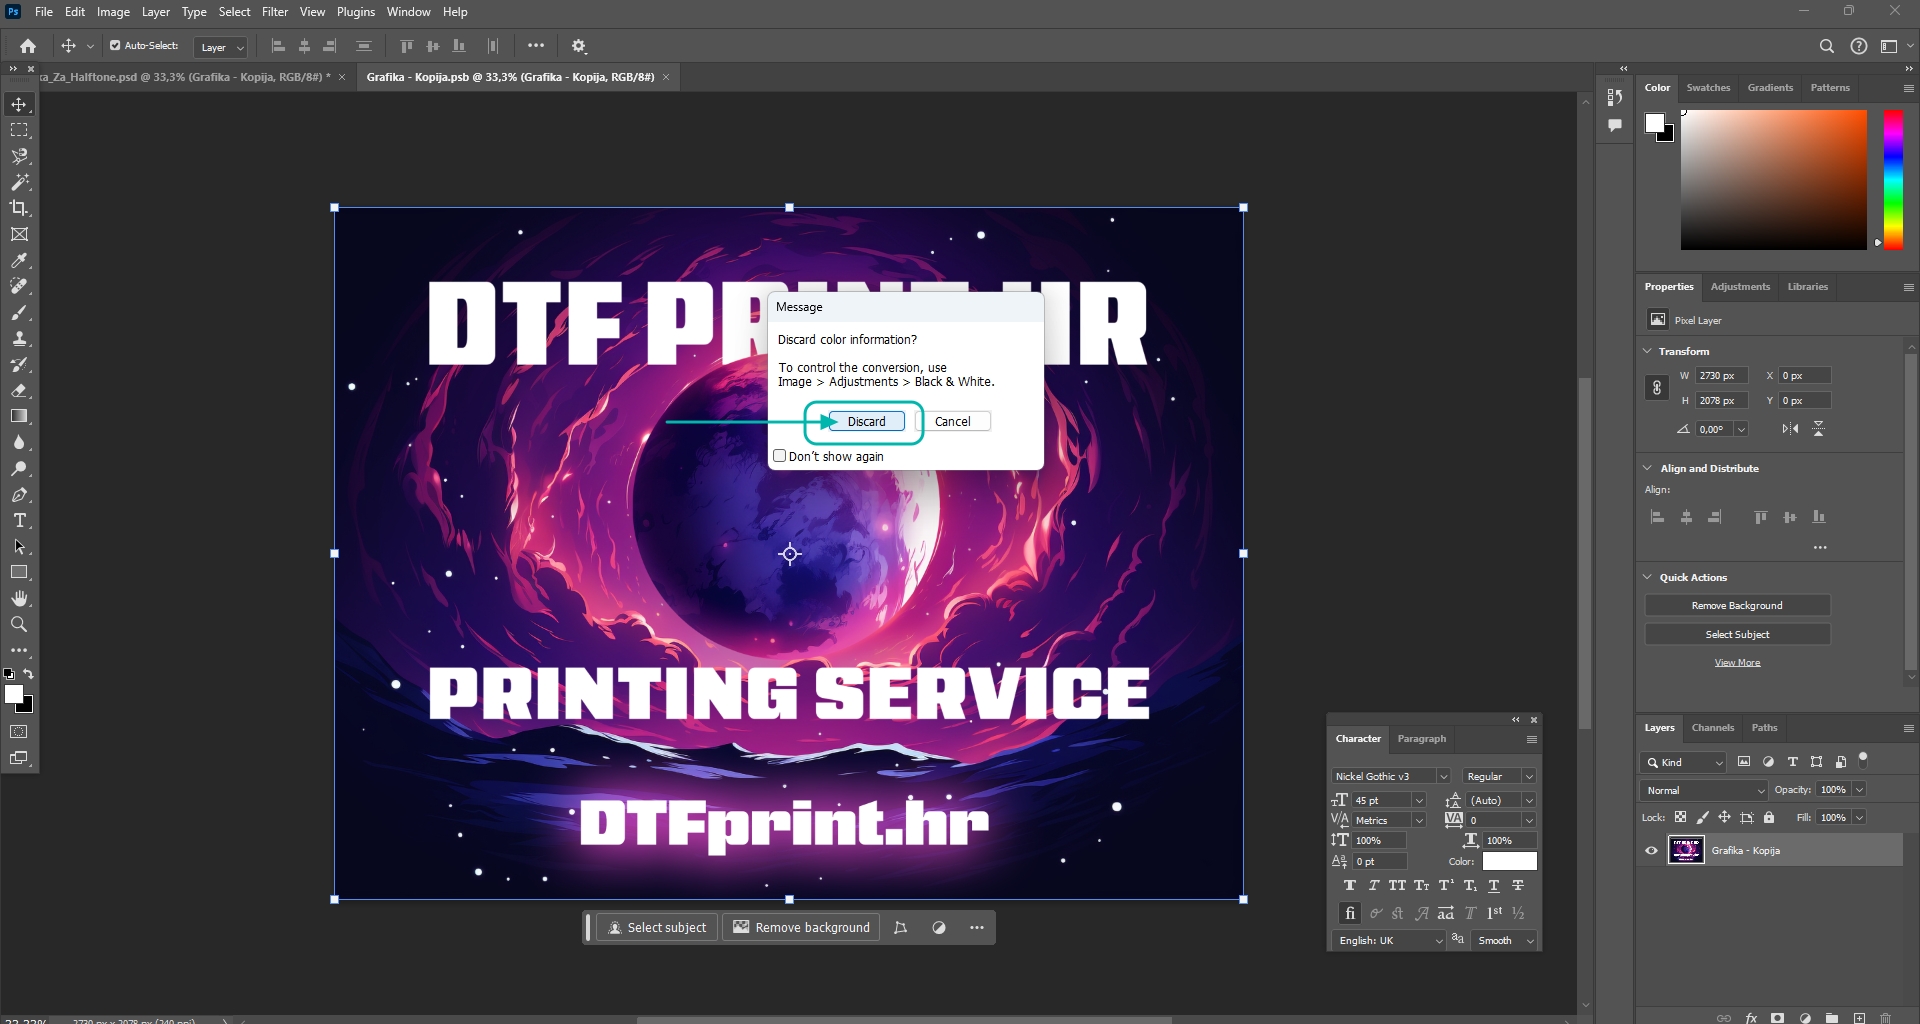
The graphic will appear in Grayscale mode.
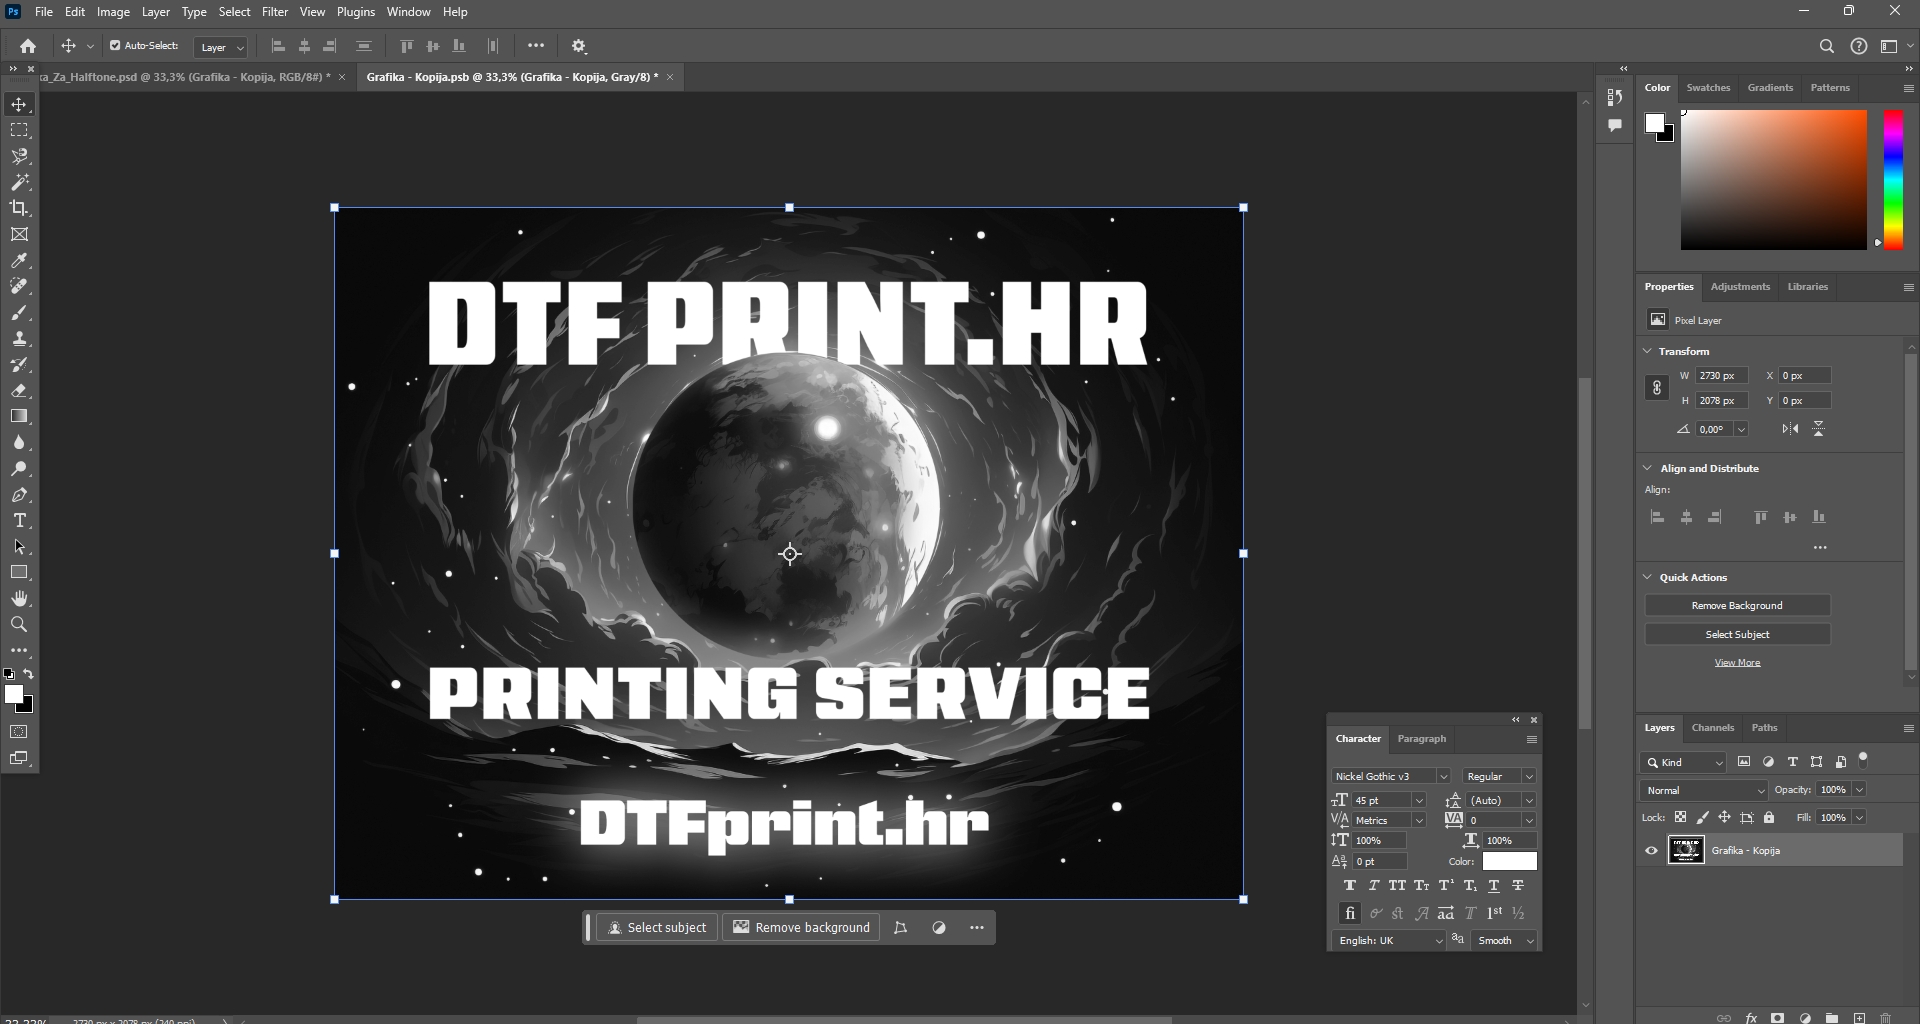
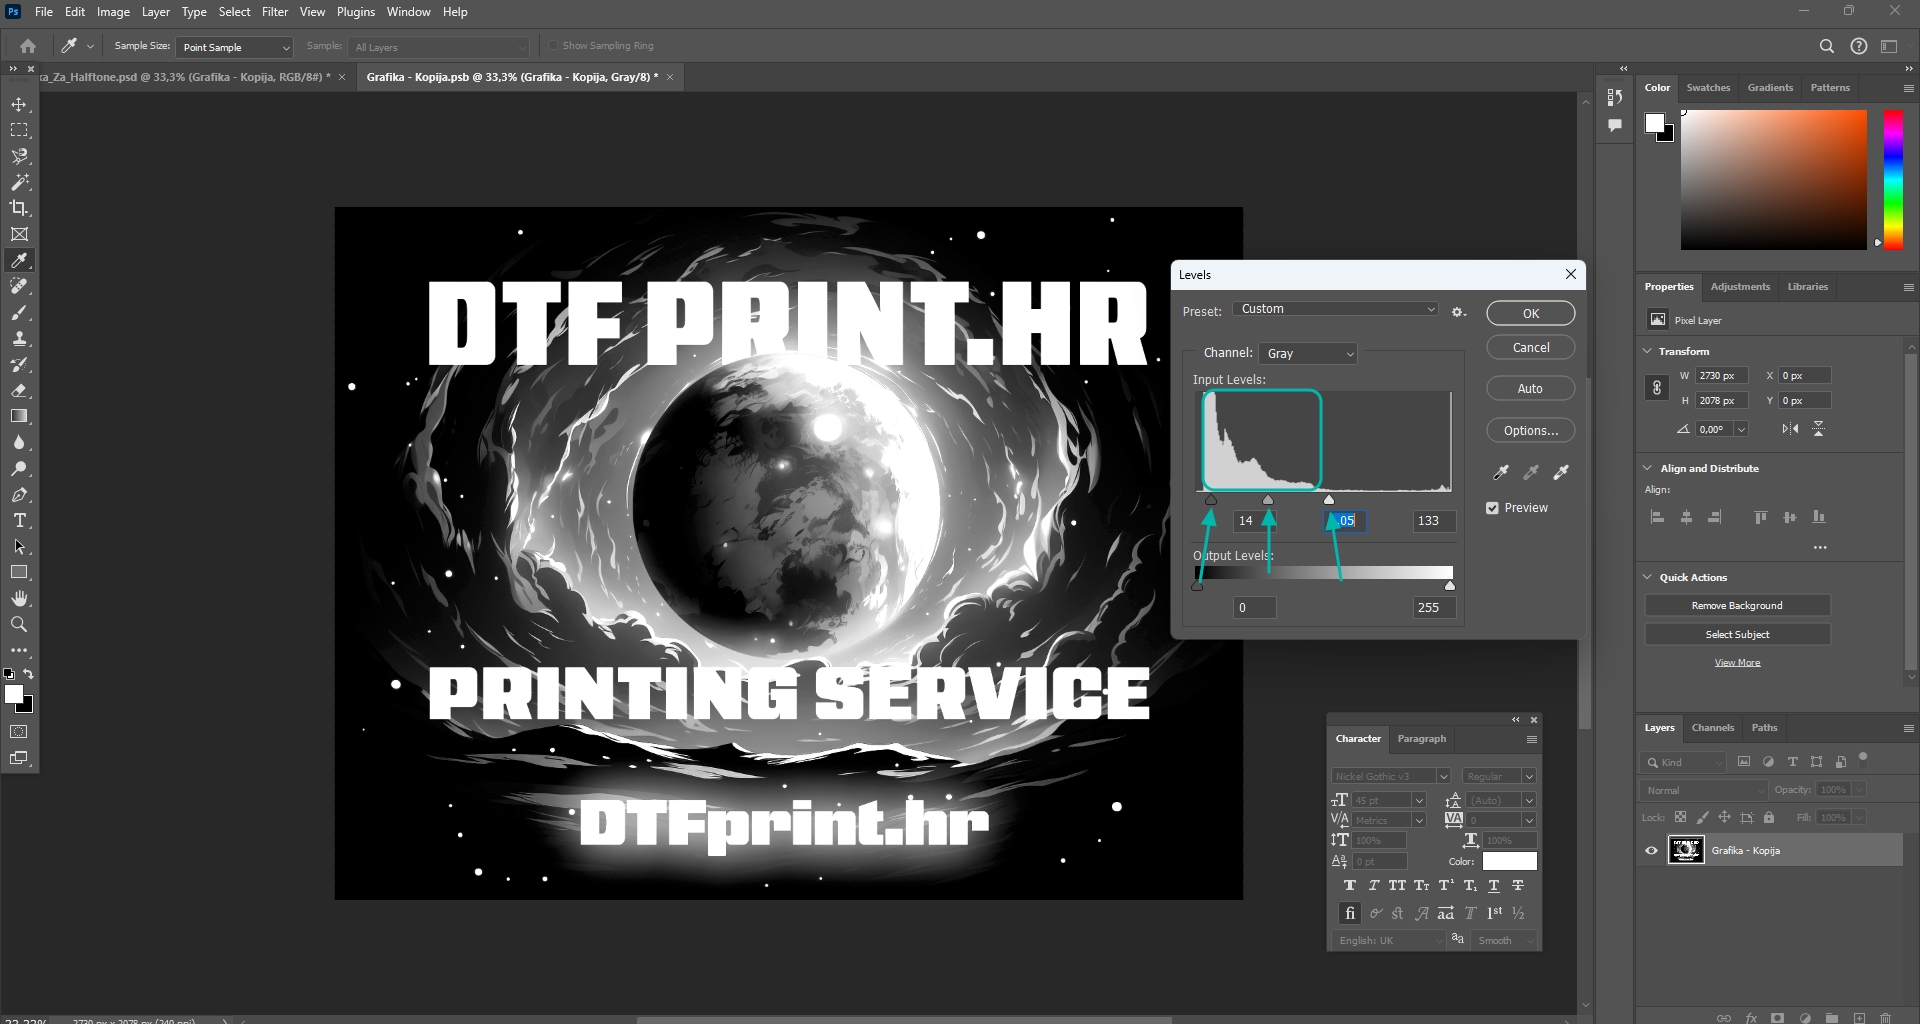
Then open Image -> Mode -> Adjustments -> Levels
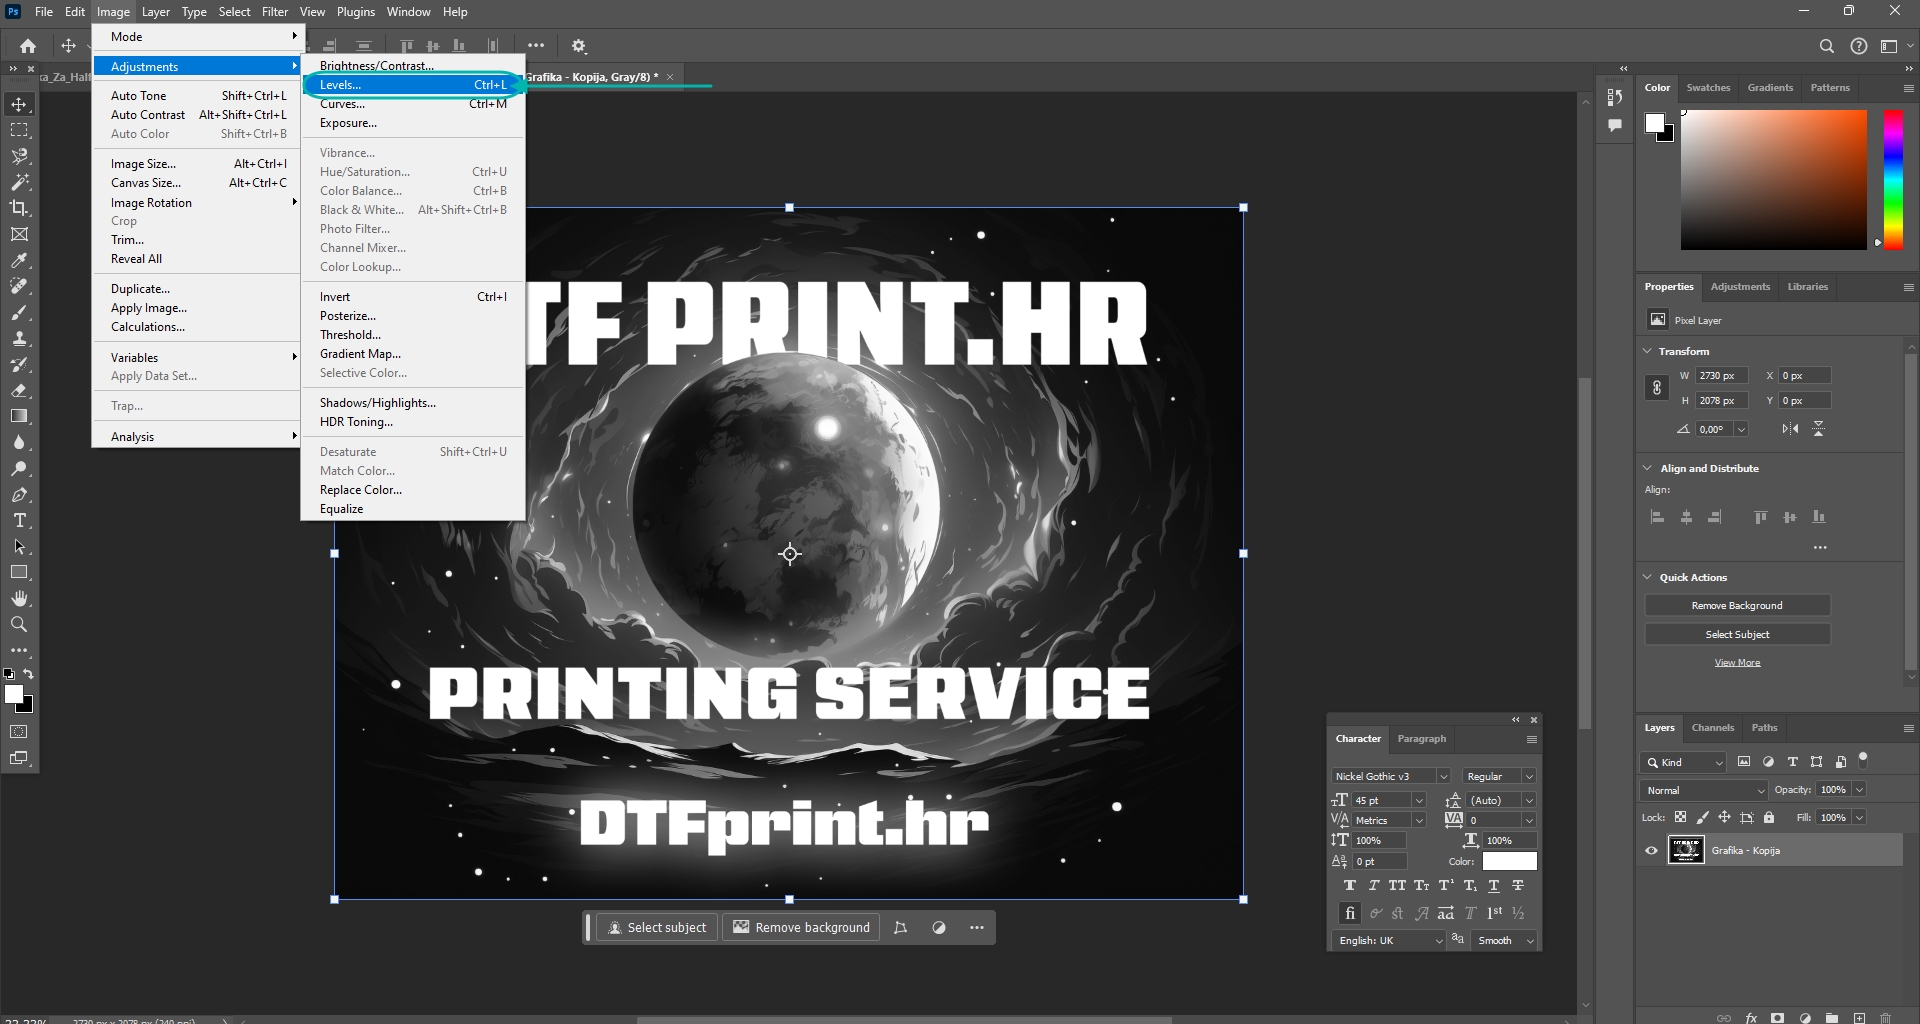
In the Levels settings, you affect the preview by moving the highlighted sliders. Drag the leftmost slider to the right and the rightmost slider to the left. In the graphic preview,
everything that is white will remain as in the original, and
everything that is gray will become halftone. Adjust the sliders until you are satisfied with what you see on screen.
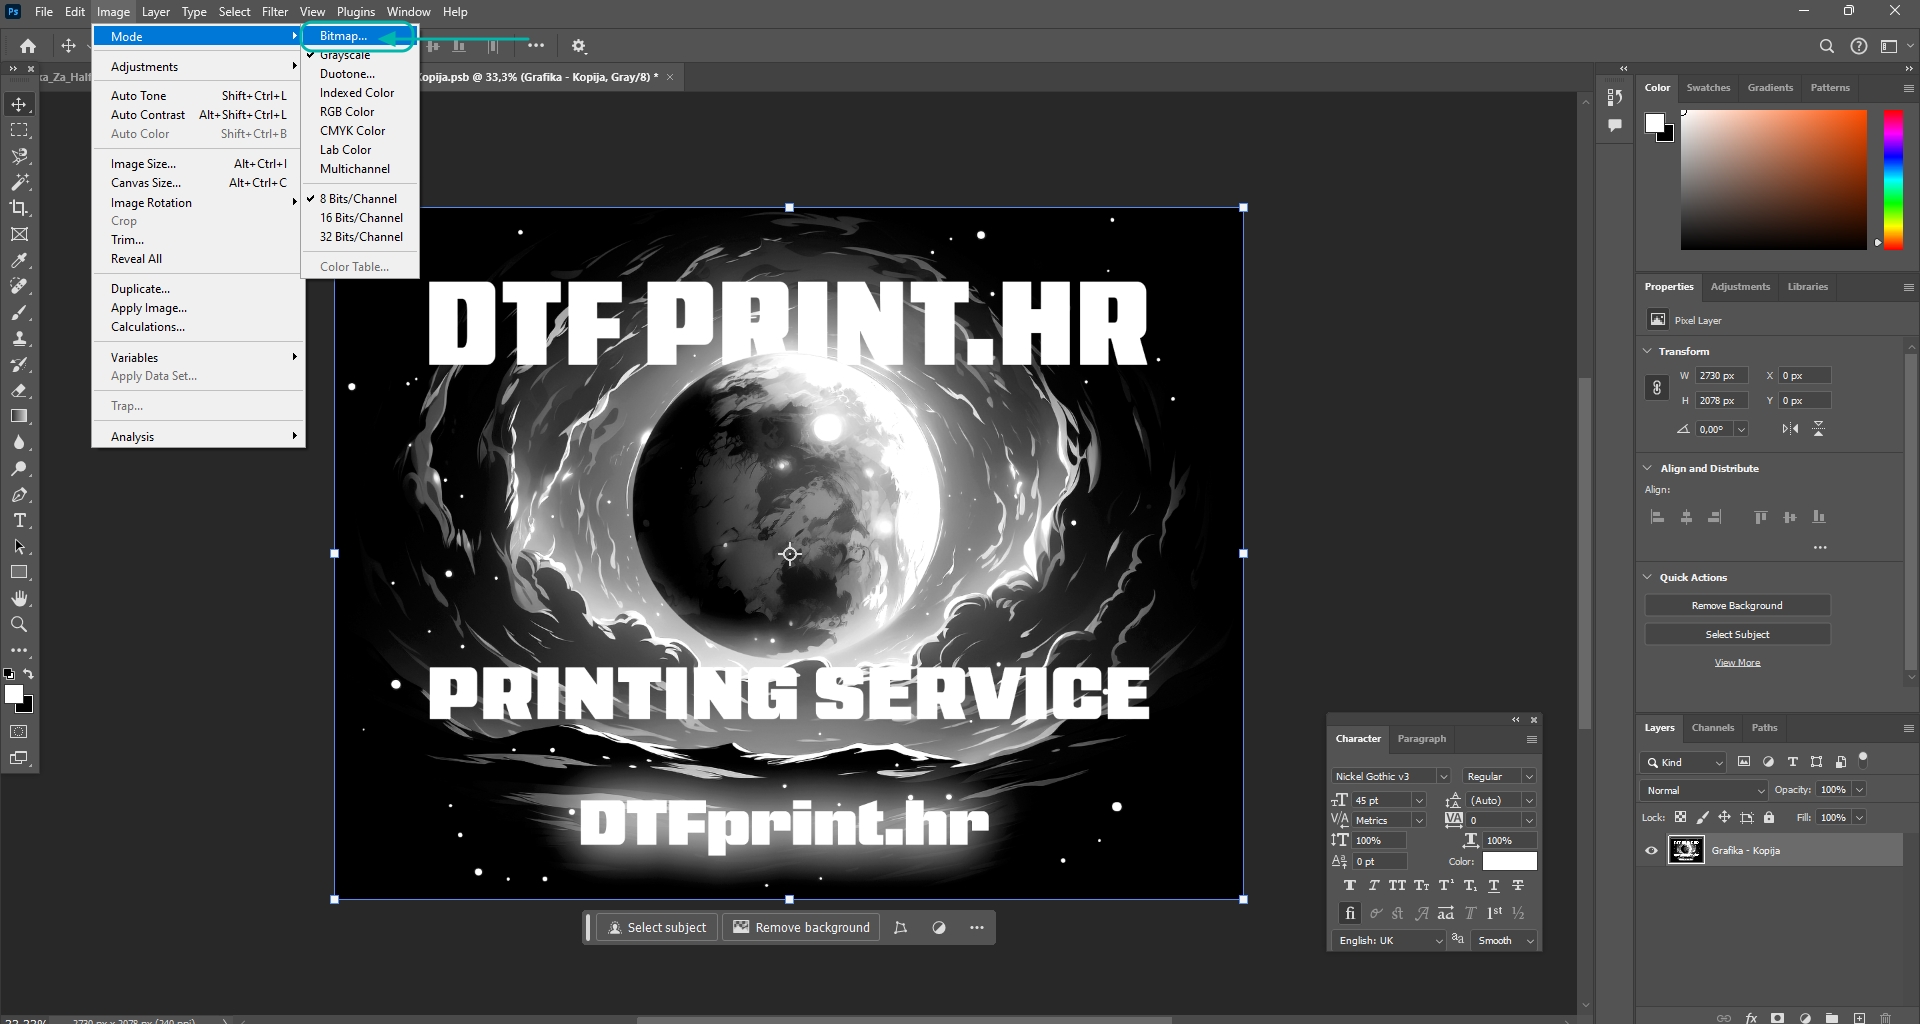
Then, in the menu, select Image -> Mode -> Bitmap
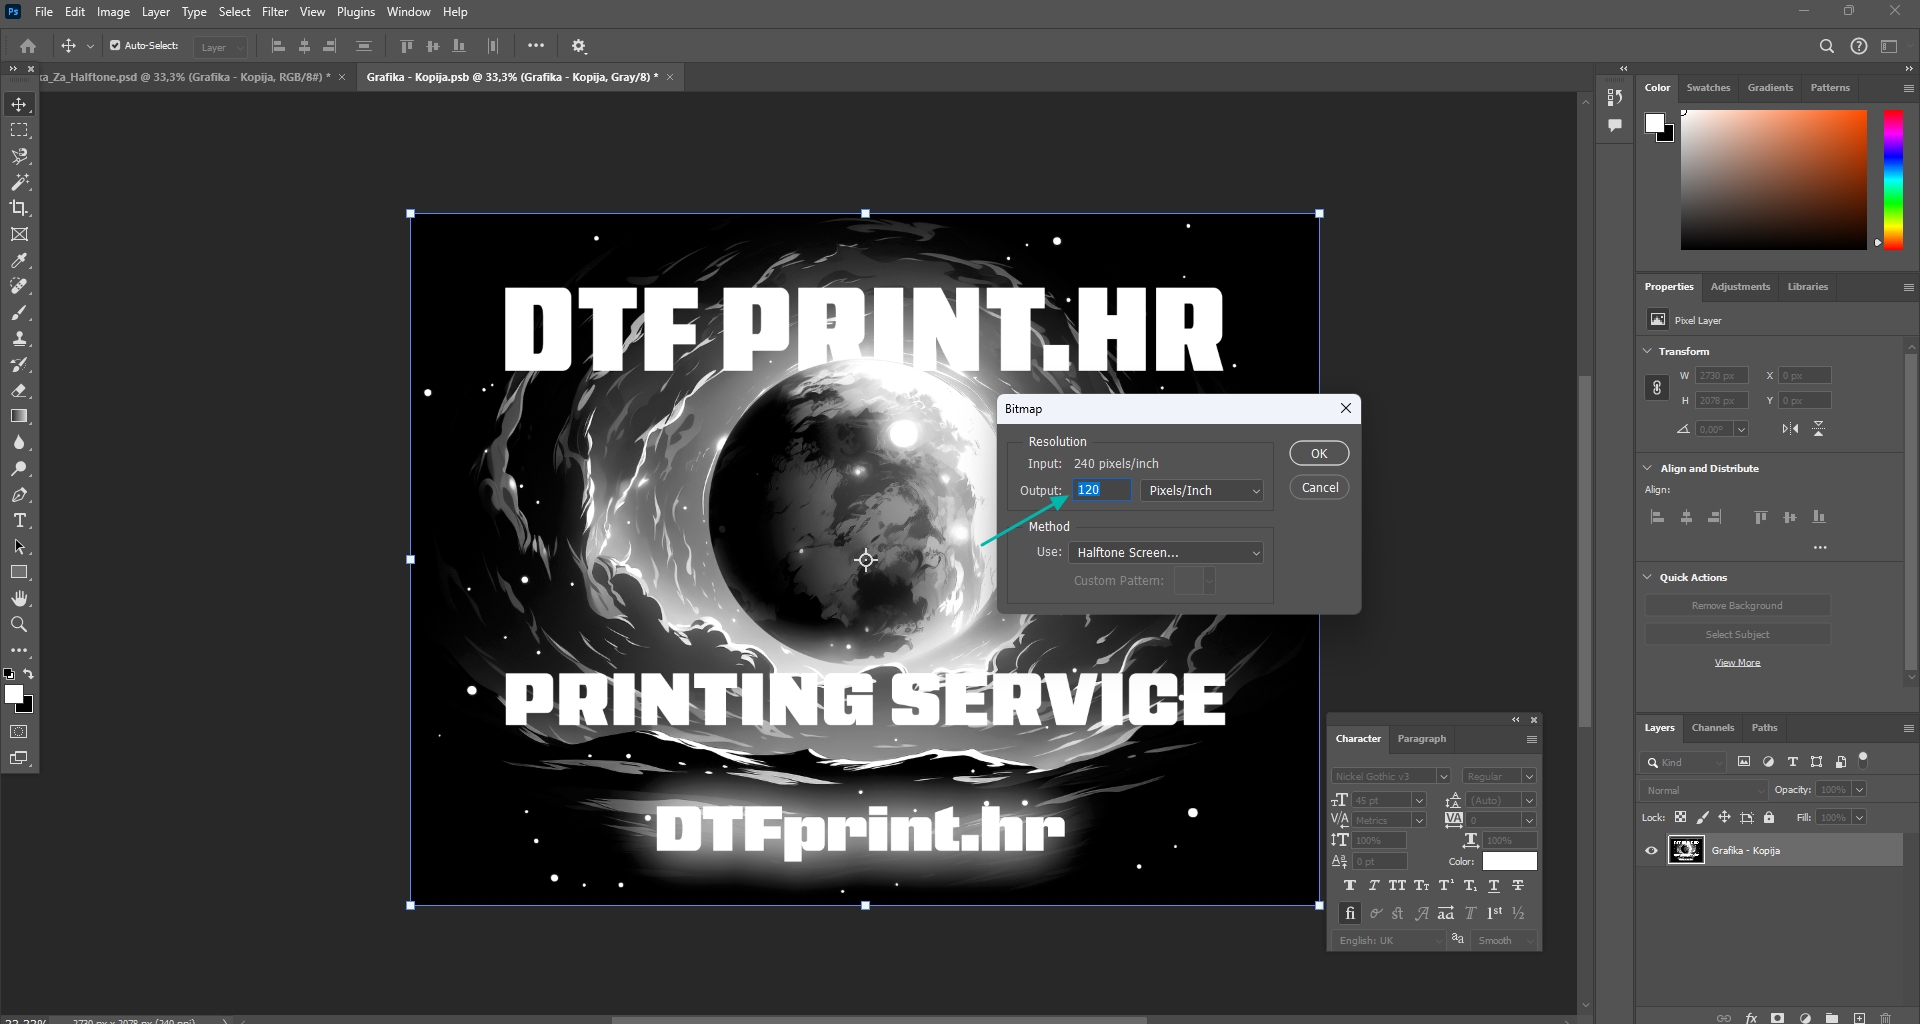
Depending on the resolution of your original graphic (input), enter the desired output. A good starting point is to have the output divided by 2, but definitely experiment until you get the desired result.
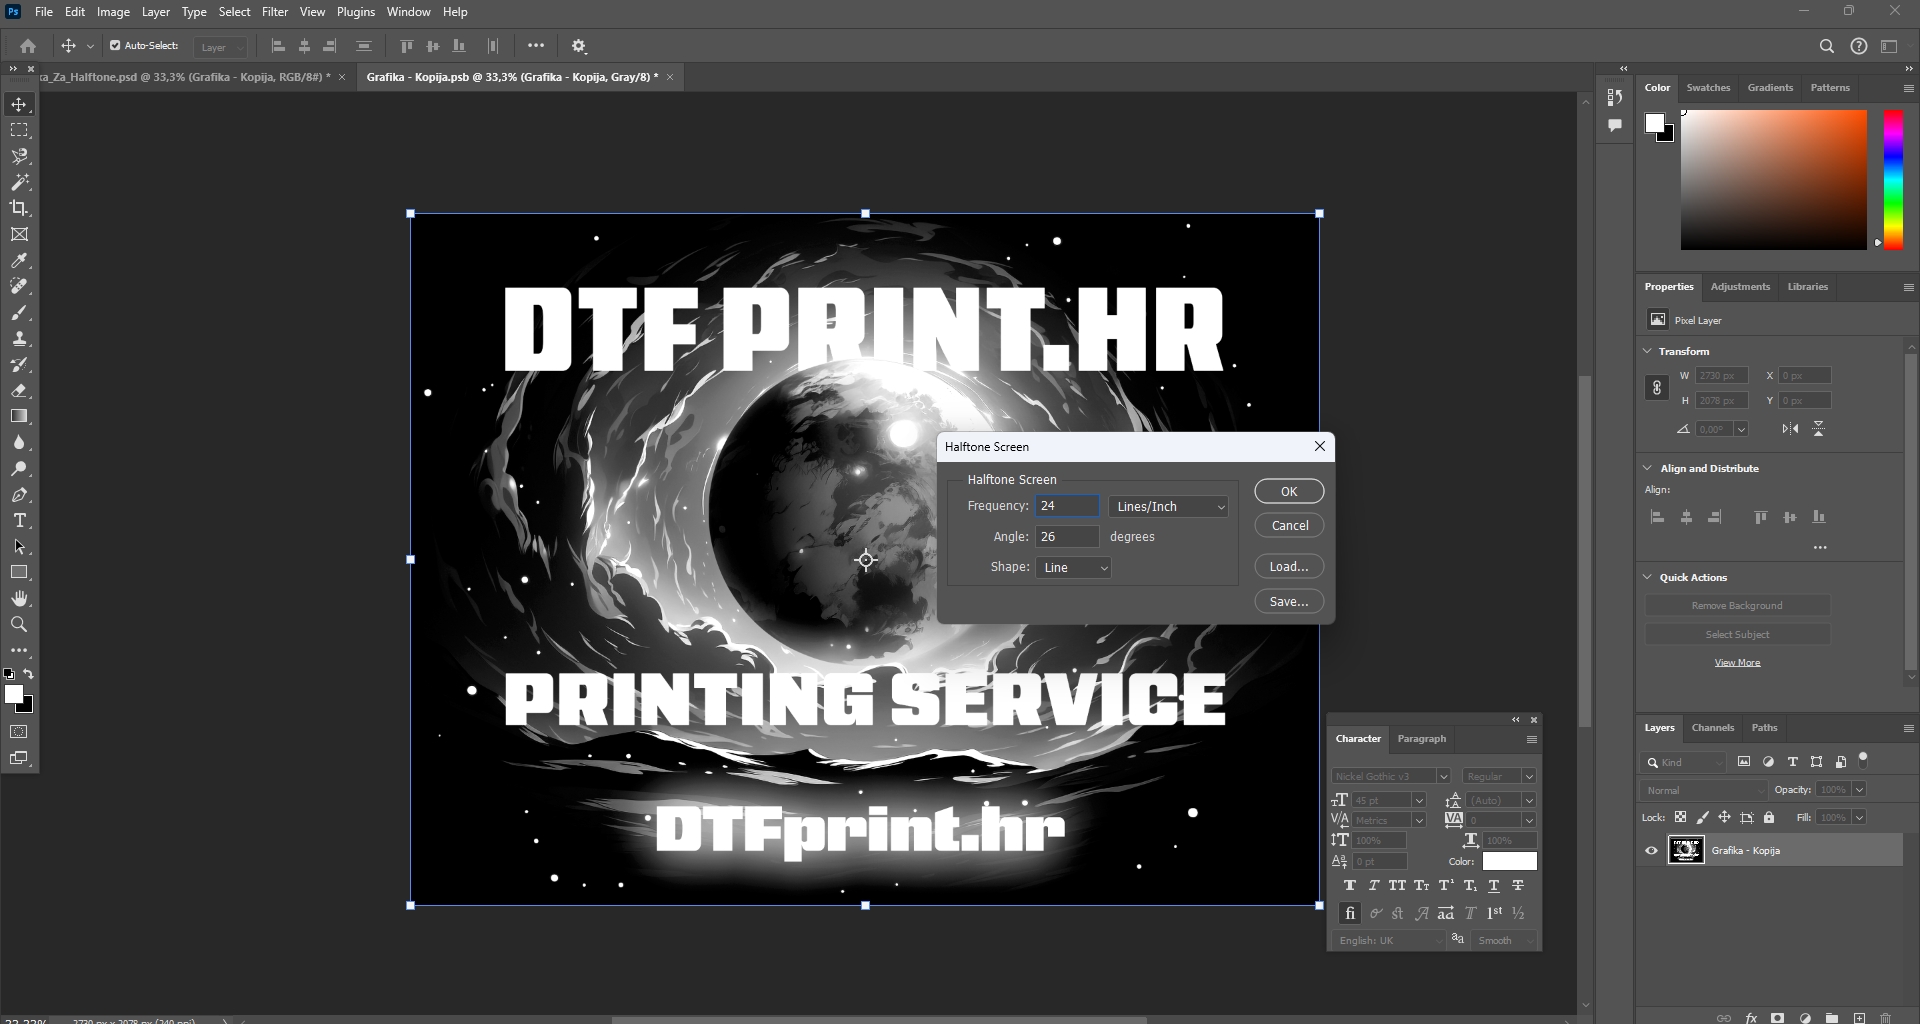
In the next dialog, select the frequency, angle, and shape of the halftone. A good starting point for DTF is a frequency of 24-30.
The lower the number - the larger the dot, and the higher the number - the smaller the dot; for the shape, use a line or a dot.
DTF printers have difficulty printing dots smaller than 0.5 mm, so the smallest dot should be 0.5 mm or larger. Although DTF printers are capable of printing at very high resolutions, problems arise when printing the white underbase and due to the fact that DTF prints are coated with adhesive powder. If a dot is too small, there is a high chance that the white underbase and/or the adhesive will not adhere to very tiny dots and therefore will not transfer to the t-shirt.
After clicking OK, a black-and-white graphic with the halftone effect applied will appear in the window. To save it, press CTRL+S or close the tab in Photoshop, after which a dialog will appear asking whether you want to save before closing.
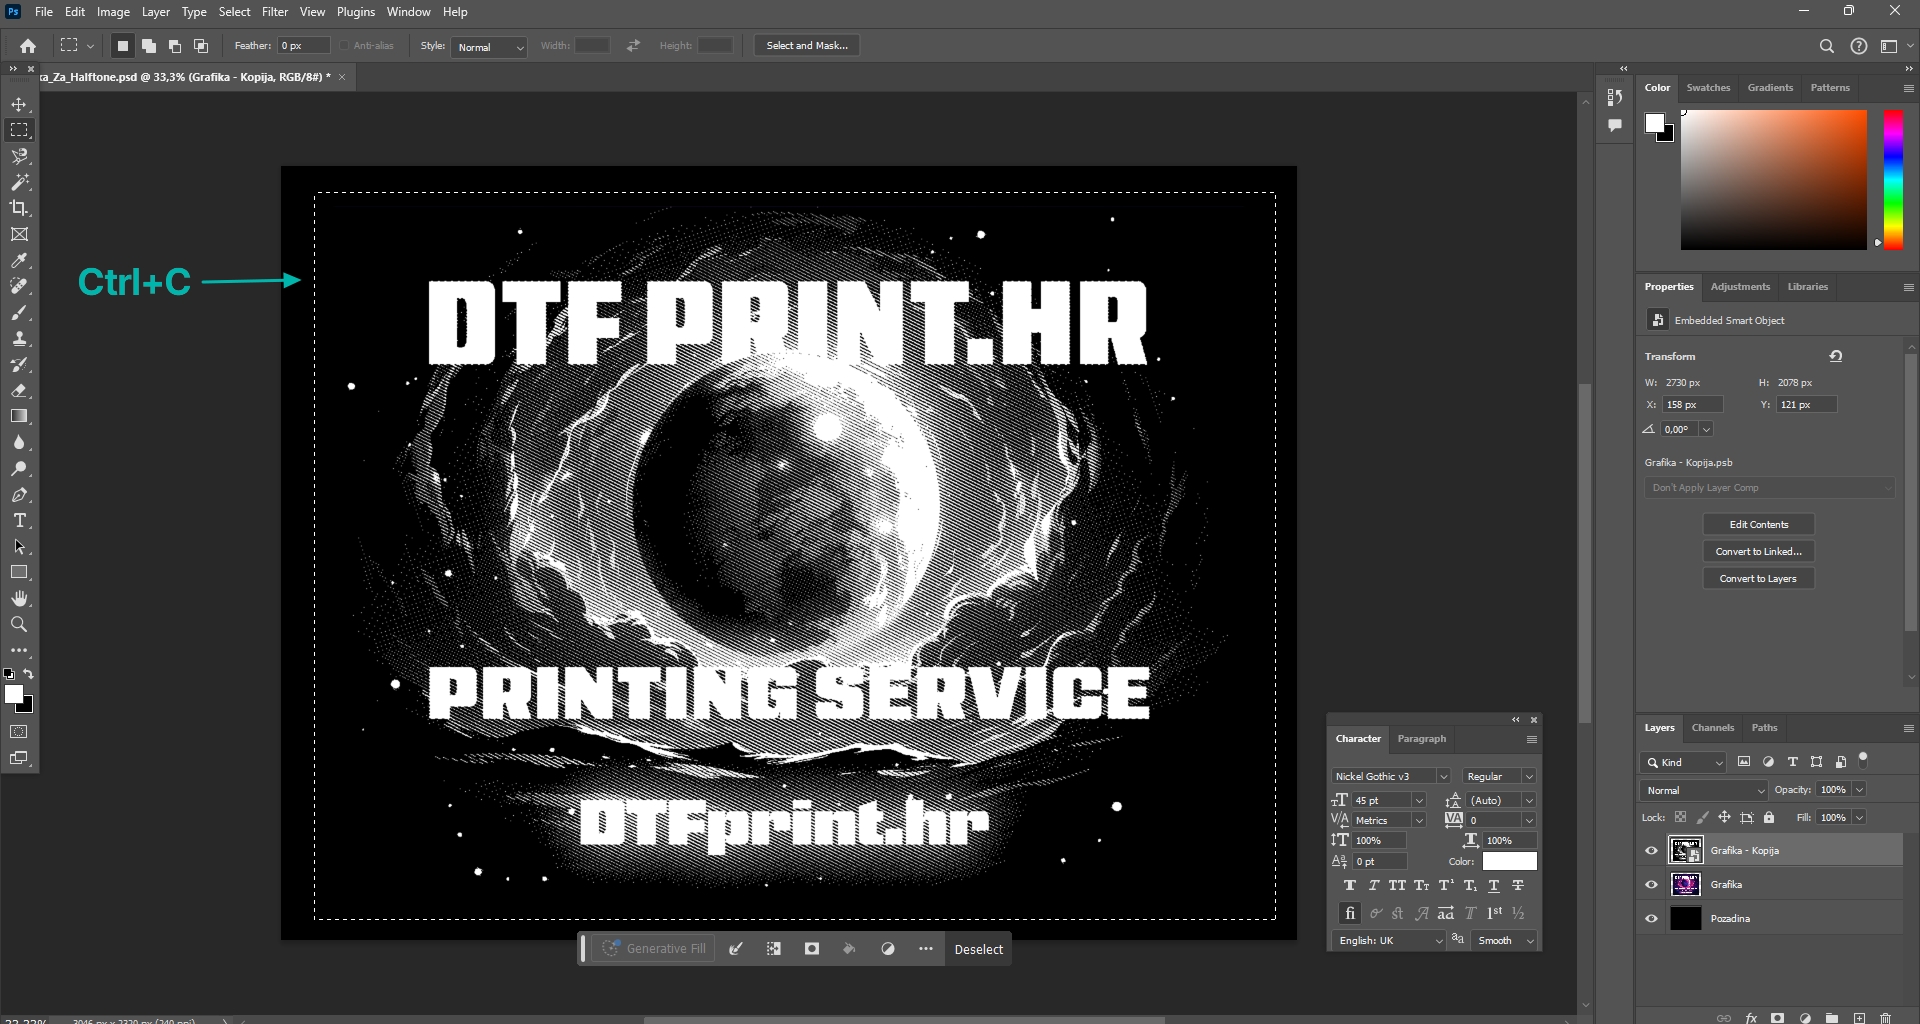
Return to the initial tab, select the upper halftoned graphic with the Marquee tool, and press CTRL+C on your keyboard.
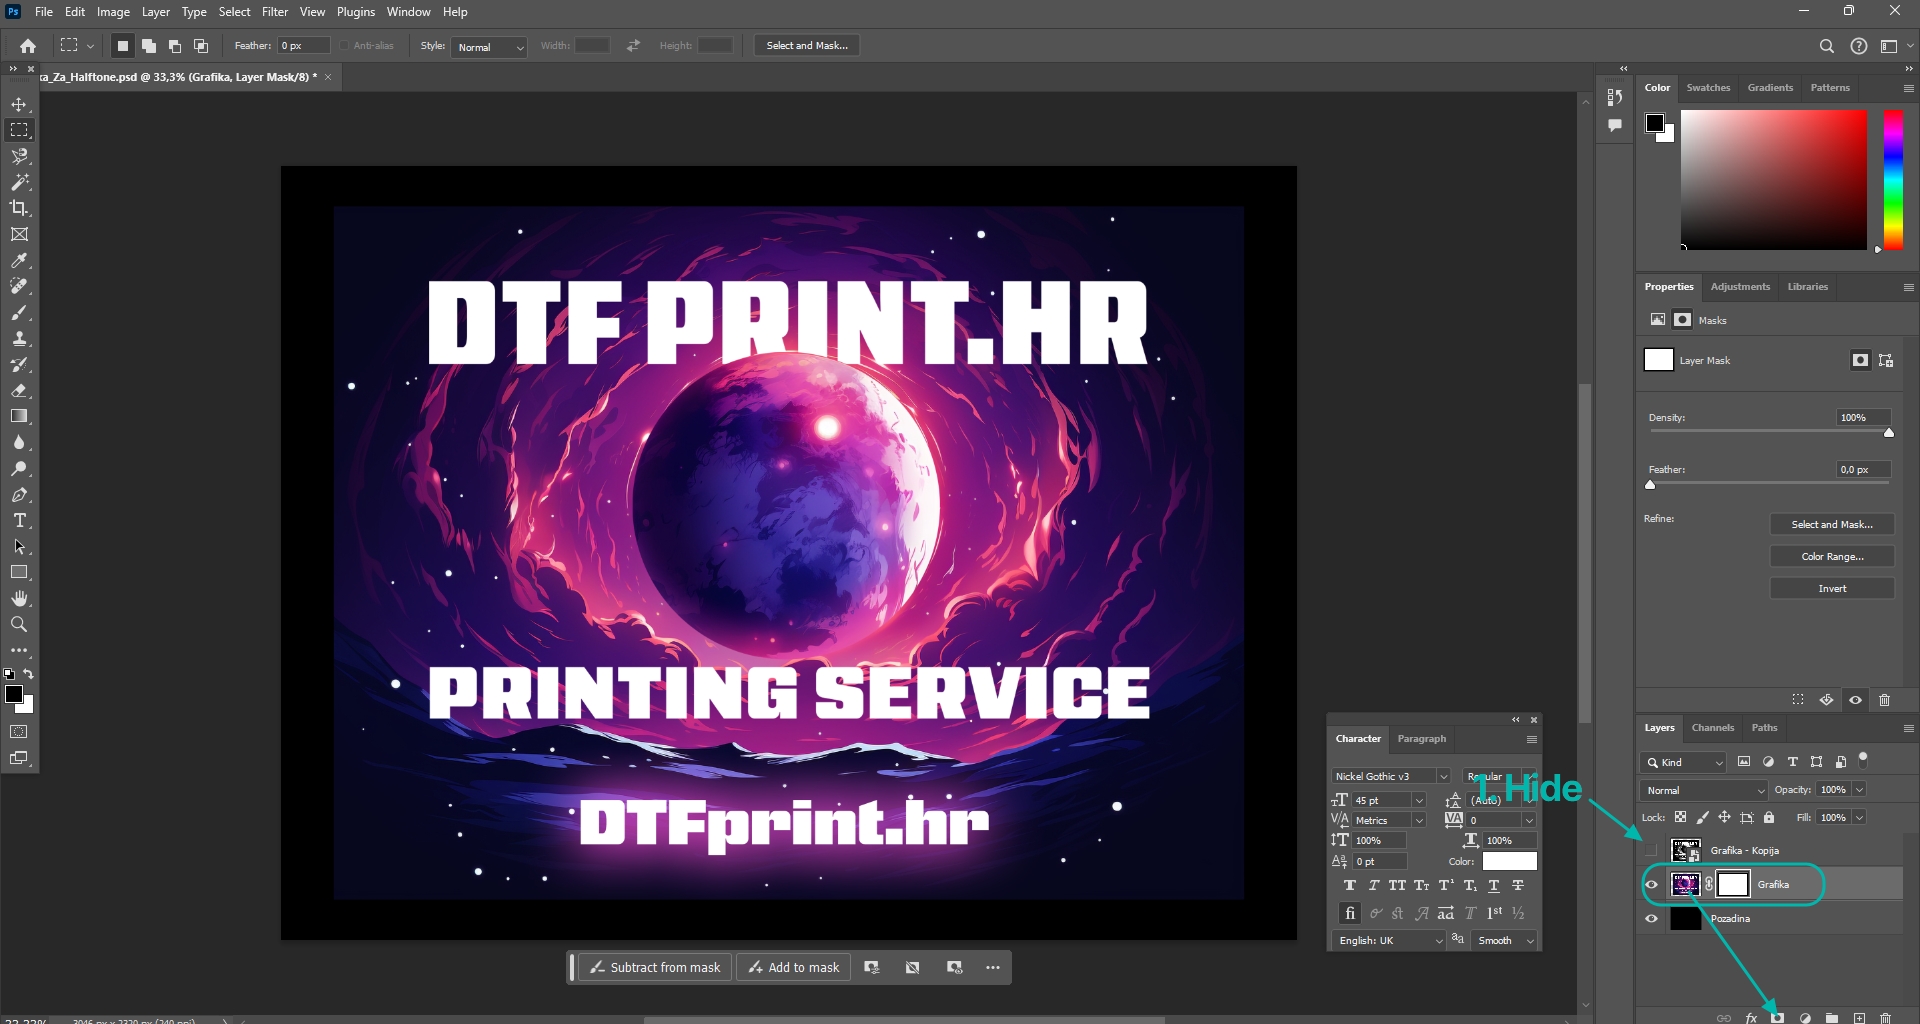
Then hide the upper halftoned layer. Select the original layer and create a layer mask by dragging the original layer onto the layer mask icon.
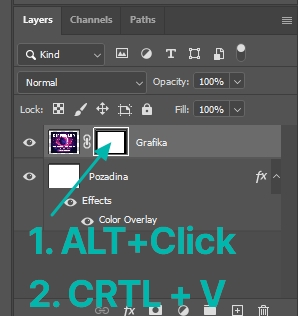
Then click the layer mask while holding ALT, and after that paste with CTRL+V
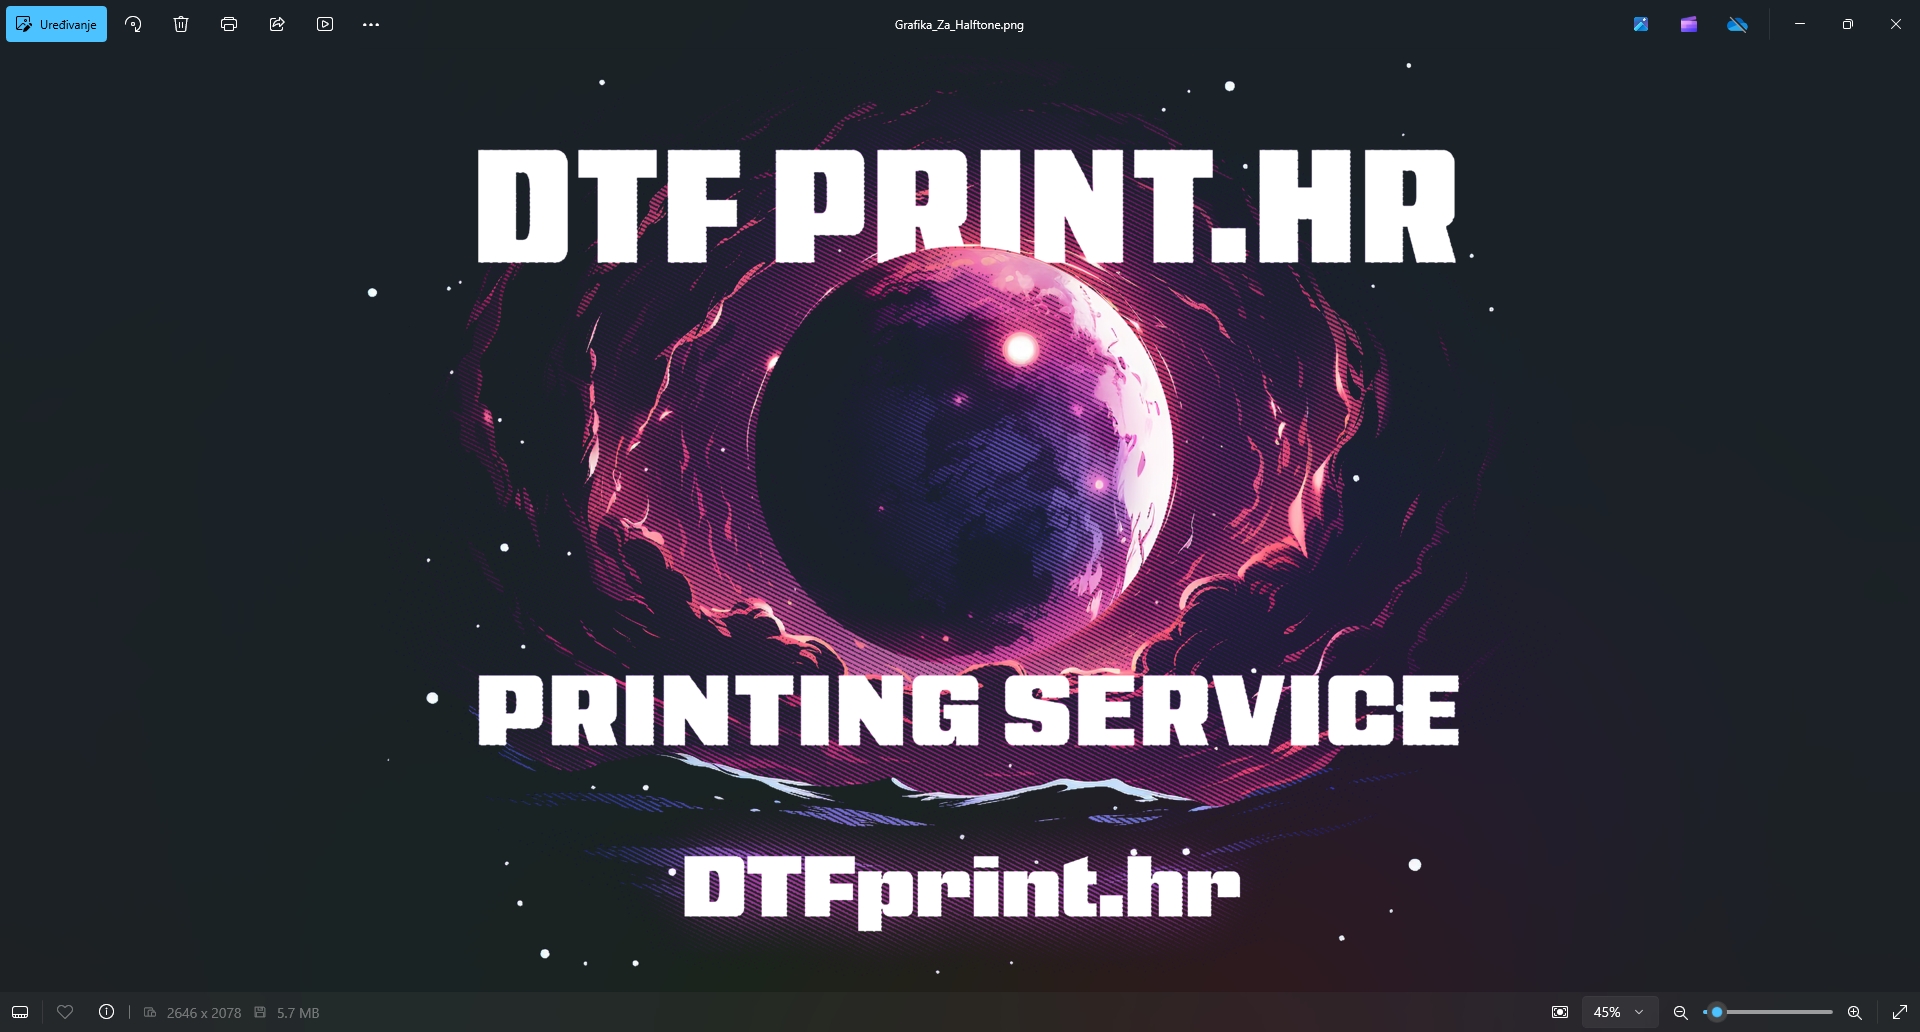
And that's it! You have now let the color from the original graphic show through the halftoned layer mask.
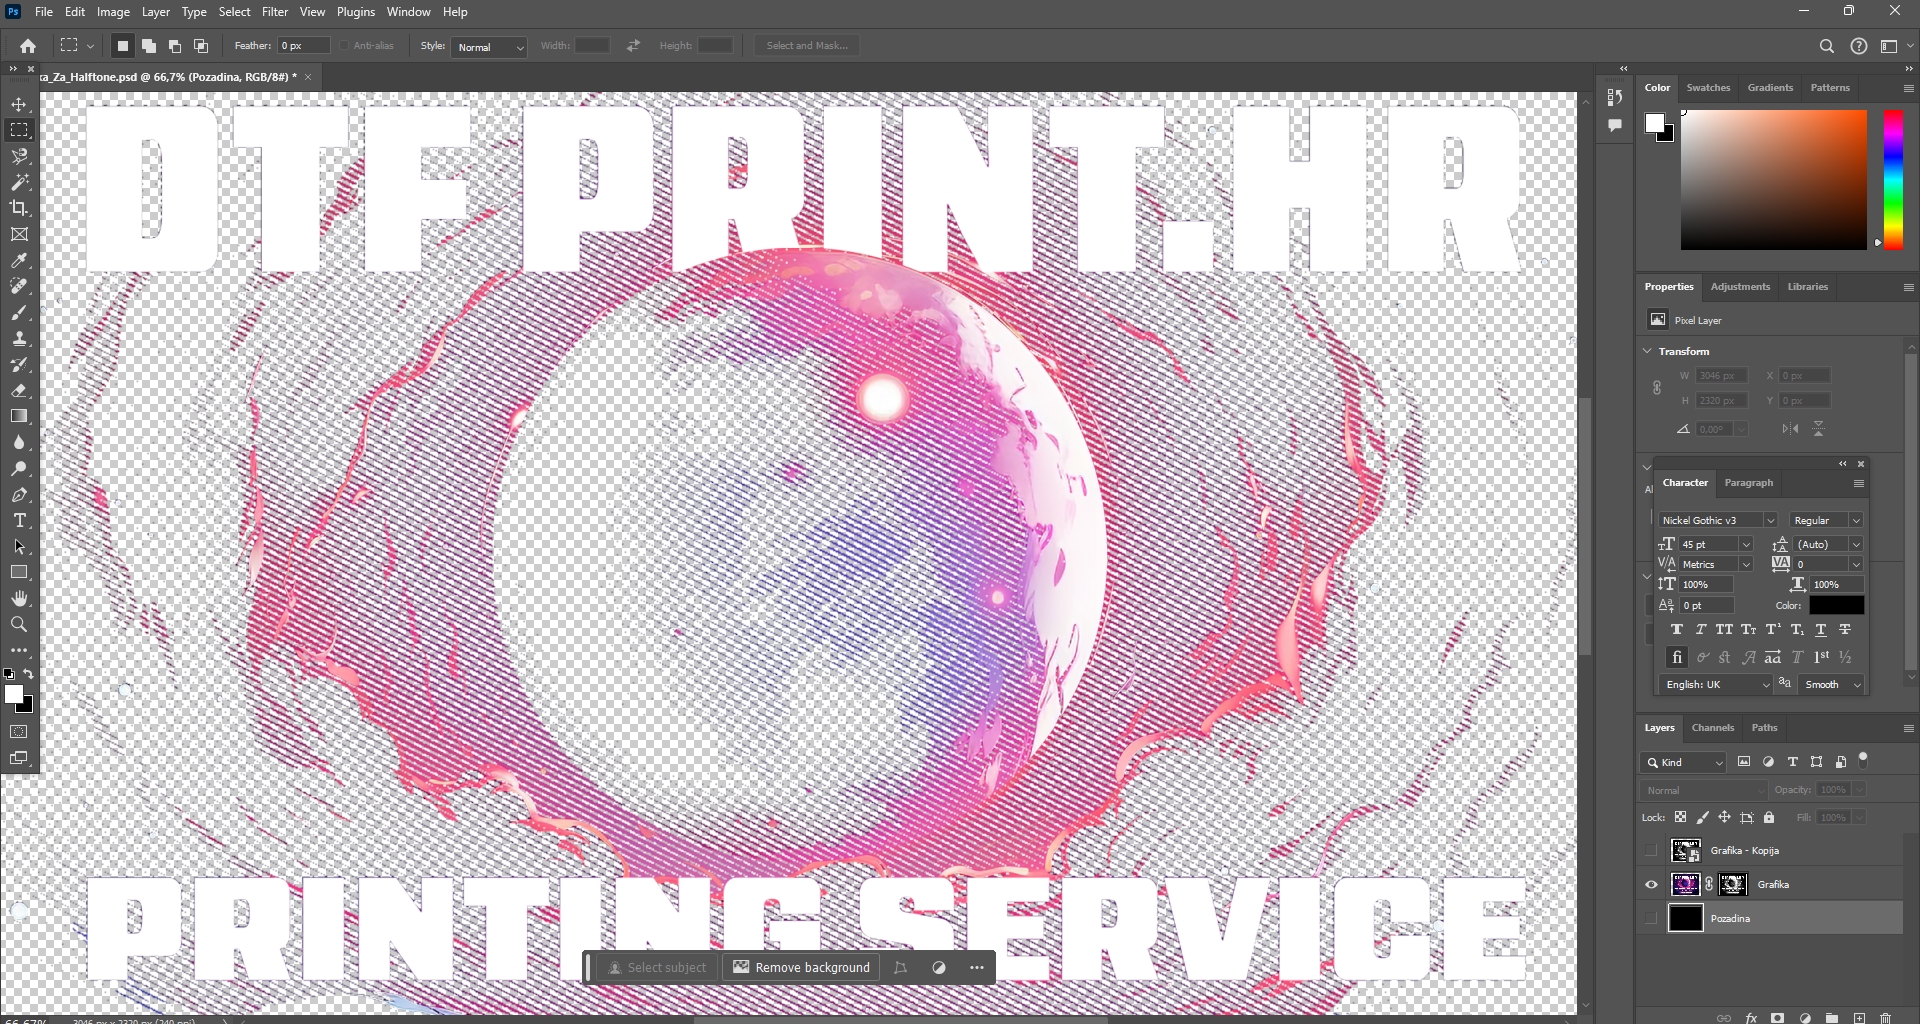
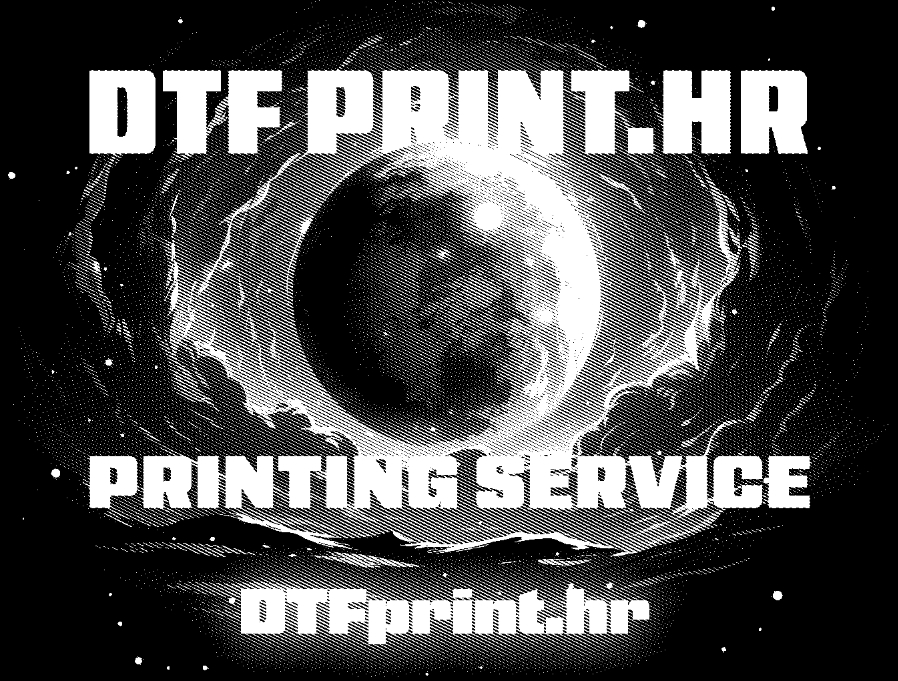
Now save the file in PNG format, and your graphic is ready to print. Result:
If you need help or information -
contact us.
 Secabo heat presses.
 Stahls heat presses.
DTF film 60cm/100m - 59,90€
Stahls heat presses.
DTF film 60cm/100m - 59,90€

 Upload PDF
 DTF Designer